Why Image Quality Matters
High-quality images help your business look professional, both online and in print. A photo that looks fine on your screen might print blurry, or a large image file might slow down your website.
This post explains what image resolution and DPI mean, how they affect quality, and how you can check them before sending files.
What Is Image Resolution?
Image resolution is the amount of detail in an image, measured in pixels (width × height).
- More pixels = more detail and sharpness.
- Fewer pixels = less detail and possible blurriness.
A large photo, for example 4000 × 3000 px, can be printed clearly. A small web image, like 800 × 600 px, might look okay on screen but will print poorly.
What Does DPI Mean?
DPI means dots per inch and describes how many tiny dots of ink a printer places on paper.
- Higher DPI = sharper print.
- Lower DPI = softer or blurry print.
Most print jobs need 300 DPI for crisp, professional results. However, if you plan to enlarge an image, the original file must have more detail — ideally a higher DPI or larger pixel dimensions — so it can stay sharp after resizing. For example, if you double the print size, you effectively halve the DPI unless the original image has enough pixels to support the enlargement.
DPI vs PPI — What’s the Difference?
- PPI (pixels per inch) is for screens.
- DPI (dots per inch) is for print.
PPI describes how tightly pixels appear on your monitor. DPI measures how densely ink dots print on paper.
Think: PPI = digital, DPI = physical.
Image Quality for Online Media
Screen images don’t use DPI. What matters is pixel size and file optimisation.
Modern screens, like Retina displays, show more pixels per inch, so focus on:
- Correct pixel width and height for where the image will appear.
- Small file size for fast loading.
- Modern formats like WebP for a good balance of quality and speed.
If you’ve been saving web images at 72, 96 or 144 DPI (or PPI), that’s fine. The number doesn’t change how the image appears, only its pixel size does.
Preparing Files for Print
When you’re sending images for print projects:
- Set resolution to 300 DPI.
- Make sure images are at least 2000–3000 pixels on the shortest side.
- Use CMYK colour mode.
- Save as TIFF or high-quality JPEG.
- Avoid screenshots or images downloaded from websites — they are usually too small.
If you’re unsure, send the file and we’ll check it for you.

How to Check Image Resolution
If you use Adobe Photoshop
- Open the image.
- Go to Image > Image Size…
- Check:
- Pixel Dimensions (width × height) for online use.
- Document Size (in millimetres or centimetres) for print.
- Resolution for the DPI or PPI value.
- Make sure Resample is unticked if you only want to check, not change, the size.
If you use macOS
- Right-click your image and choose Open With > Preview.
- In Preview, choose Tools > Show Inspector (Command + I).
- Click the More Info tab to see resolution, DPI and pixel dimensions.
If you use Windows 10 or 11
- Right-click the image and choose Properties > Details.
- Look for Horizontal resolution and Vertical resolution for DPI, plus pixel width × height.
Using AI to Enhance and Upscale Images
Advances in artificial intelligence now let us enhance files and upscale images for print or large-format use. These tools use smart algorithms to reconstruct details and increase pixel dimensions rather than simply stretching a small image.
Specialised AI platforms can upscale images by 200% to 400% (or more) while preserving or improving sharpness and clarity.
How to use AI for your files:
- Start with your highest-quality version. AI works best when the original already has some detail.
- Use an AI upscale tool to increase pixel dimensions for large print or detailed usage.
- Check again that the final file meets your print or online specs (300 DPI for print, correct pixel size for web).
Note: AI upscaling isn’t a magic fix for very low-resolution or heavily compressed images. If the original file is too small or blurry, even AI will struggle to create real detail.
Common Myths and Mistakes
“I can increase DPI to make it high-res.” Changing DPI doesn’t add detail. A small image will still print poorly.
“DPI matters for web images.” It doesn’t. Screen images rely on pixel count, not DPI.
“Bigger file equals better image.” Large files can still be poor quality if the original was low-resolution.
Quick Checklist Before Sending Files
- 300 DPI for print.
- Higher resolution if the image will be enlarged.
- Large pixel dimensions.
- CMYK for print, RGB for digital.
- TIFF or high-quality JPEG for photos.
- PNG for drawings, line graphics or images with transparency.
- Optimised WebP for online use.
We understand the above can sound technical. As part of our service, we prepare the right file formats and colour profiles for your projects. Just send us your high-resolution images and we’ll take care of the rest.
Need Help?

We’re experienced in preparing images for print and online media. If you’re not sure your files are ready, contact us to send them through and we’ll check the resolution and format so your project looks great everywhere.
Author’s notes
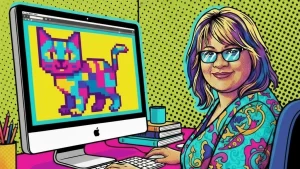
It’s November 2025. As I finish writing this article, I’m exploring and testing new AI design tools to improve my creative workflow and efficiency. For this blog post, I worked with ChatGPT Pro app, Nano Banana (and Nana Banana, paid app), and Recraft AI Paid app, to help structure the content, create supporting graphics, and explore visual ideas.
These tools assist me in research and production, but every concept, example, and technical insight is grounded in my 35+ years of professional design experience. AI helps me work faster and communicate ideas more clearly, while my creative judgement, design expertise, and attention to quality remain at the core of everything I do.